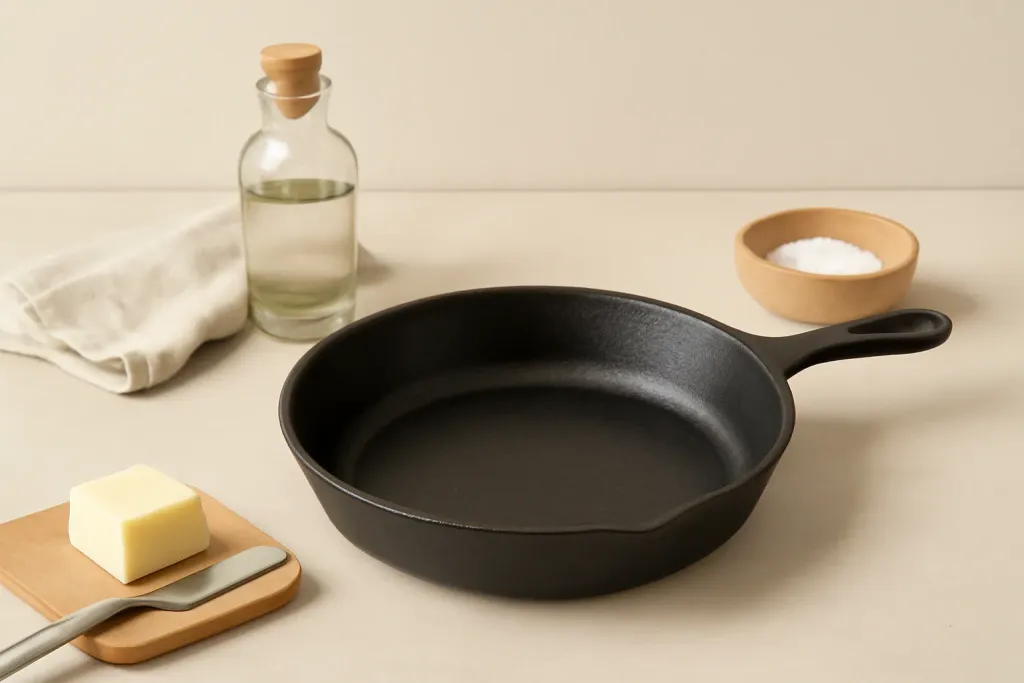
What seasoning on cast iron means
If you are learning how to season a cast iron skillet, the first thing to understand is that seasoning is not a spice blend. In cast iron care, seasoning refers to a thin, baked-on layer of oil that bonds to the pan’s surface. Over time, this layer helps create a smoother cooking surface and supports everyday use.
A properly seasoned skillet is not necessarily shiny like a new nonstick pan, and it does not need to look perfect to work well. In fact, seasoning often develops gradually with regular cooking. The goal is not a single dramatic finish, but a stable layer that can be maintained over time.
Many cast iron pans arrive with some level of seasoning from the manufacturer, while others need a stronger initial coating before use. Either way, the basic idea is the same: clean the skillet, apply a very thin film of oil, and heat it so the oil transforms into a bonded layer. This process is commonly called polymerization.
Because cast iron is reactive to moisture, seasoning also helps protect the metal surface between uses. That is one reason people revisit the question of how to season a cast iron skillet after cleaning, rust, or prolonged storage. The process is simple, but the details matter.
Before you start: what you need
You do not need specialty gear to season a cast iron skillet, but a few basic tools make the process easier. Start with a clean skillet, a small amount of neutral cooking oil, a lint-free cloth or paper towel, and an oven that can hold a steady temperature. Some cooks also use foil or a lined baking sheet on the lower rack to catch possible drips.
Choose an oil that is commonly used for seasoning and can be heated safely at oven-seasoning temperatures. Many guides favor neutral oils because they have little flavor and are convenient for kitchen use. The exact choice is less important than applying a very thin layer and heating it thoroughly.
Before seasoning, wash away any residue from storage, packaging, or previous use. If the skillet is new, read the manufacturer’s guidance first, since some products are sold pre-seasoned and may include care recommendations. If the skillet has visible rust, flaking buildup, or sticky residue, address that before applying new oil so the coating can bond more evenly.
It is also worth preparing your workspace. Oven seasoning can produce some odor and, in some cases, a little smoke if oil is applied too thickly. Good ventilation is helpful. Keeping the layer thin and the oven temperature steady reduces the chance of a tacky finish.
Step-by-step seasoning process
The most reliable answer to how to season a cast iron skillet is to use several thin layers rather than one heavy coat. Start by washing the skillet with warm water and a small amount of mild soap if needed, then dry it completely. Cast iron should be dry before oil goes on, because trapped moisture can interfere with the finish.
- Apply a small amount of oil to the entire skillet, inside and out.
- Use a cloth or paper towel to spread it until the surface looks nearly dry. If you can see a wet sheen or pooled oil, there is too much.
- Place the skillet upside down in the oven with foil or a tray below it to catch excess oil.
- Heat the oven to a moderate seasoning temperature, commonly around 450°F, unless the manufacturer suggests otherwise.
- Bake for about one hour, then let the skillet cool in the oven or on a heat-safe surface before handling.
If you want a stronger initial layer, repeat the process several times. One thin coat can improve the surface, but multiple coats usually create a more even result. The key is patience. Applying more oil does not create better seasoning; it usually creates a sticky finish that takes longer to correct.
After the final cycle, the skillet may look darker and feel smoother, though results vary. Seasoning is a process, not a one-time event. Normal cooking with fats and regular cleaning will continue to build the surface.
Why thin layers work best
When people ask how to season a cast iron skillet, the most common mistake is using too much oil. A thick coating may seem like it would create a stronger finish, but in practice it often leaves behind a gummy or blotchy surface. That happens because excess oil does not fully bond the way a thin film can.
Thin layers encourage even heating and more complete bonding. This is why many seasoning instructions recommend wiping the skillet until it looks almost dry before it goes into the oven. The aim is not to leave visible liquid behind. Instead, you want a light film that can change under heat into a durable coating.
This also explains why seasoning sometimes looks uneven after the first attempt. New seasoning can appear patchy or lightly streaked, especially on pans that already have some factory coating or previous use. A second or third cycle often evens things out more than a heavy single application would.
It helps to think of seasoning as cumulative. Each thin layer adds to the next. Even if the skillet does not look finished after one round, continuing with careful, thin coats usually produces a better result than trying to rush the process.
Browse our recommended products
Our featured picks refresh periodically. While we update them, our editorial guides can help you find the right pick.
See our guidesCommon mistakes to avoid
Most problems in seasoning come from a few avoidable errors. The first is leaving the skillet damp before oiling. Any moisture on the surface can interfere with the bonding process and may contribute to rust if the pan sits too long before heating.
The second mistake is using too much oil. If you can feel a slick film or see visible beads, wipe them away before the pan goes into the oven. Extra oil tends to pool, smoke, or harden unevenly. This is one of the quickest ways to end up with a tacky surface instead of a clean seasoning layer.
A third mistake is using extreme heat without checking the manufacturer’s guidance. While cast iron itself tolerates high heat, the seasoning process should follow the pan maker’s instructions when available. A moderate oven temperature is usually enough for home seasoning and is easier to control.
Another issue is forgetting the outside and handle. While the cooking surface matters most, a light coating on the exterior can help maintain a more uniform finish. Just be careful not to leave buildup in decorative grooves, around the handle, or on any surfaces where oil might collect.
Finally, avoid seasoning over heavy rust, burnt residue, or sticky old oil. Clean the skillet first. Seasoning works best on a bare, dry, well-prepared surface.
How to maintain seasoning after cooking
Once you know how to season a cast iron skillet, the next step is keeping that surface in good shape. Regular maintenance is usually simpler than the initial seasoning. After cooking, let the pan cool, wash it as needed, dry it thoroughly, and store it in a dry place. Many cooks also apply a very light wipe of oil after drying, especially if the skillet will sit unused for a while.
Cleaning is important, but it does not need to be harsh. A chainmail scrubber, nylon brush, or nonabrasive sponge can remove stuck bits without stripping the surface unnecessarily. If soap is used, a small amount is generally enough for routine cleaning. The main point is to remove food residue and then dry the pan completely.
If the skillet starts to look dull, dry, or lightly patchy, a quick re-seasoning cycle may help. You do not always need a full rebuild. Sometimes one thin coat is enough to refresh the surface after repeated washing or heavy use.
Storage matters too. Keep the skillet in a dry location, and avoid stacking it while wet. If it is stored inside another pan or with a lid on top, make sure there is no trapped moisture. Cast iron lasts well when it is kept clean, dry, and lightly maintained.
When to re-season a skillet
Re-seasoning is worth considering when the skillet loses its smooth look, develops a dull gray cast, or shows small areas of rust. You may also want to re-season after aggressive scrubbing, long storage, or if food begins sticking more than usual. These are signs that the current layer may need reinforcement.
Not every sticking issue means the pan is ruined or needs a complete reset. In many cases, the skillet simply needs better cleaning, more careful drying, and a fresh thin coat of oil. The best approach depends on the condition of the surface. If there is only mild wear, a light refresh is usually enough. If there is rust or built-up residue, clean more thoroughly before seasoning again.
It is also normal for certain spots, such as the center of the cooking surface, to wear faster than the rest. This does not always require a full oven cycle. Repeated cooking with a small amount of oil can gradually improve those areas, especially when combined with consistent care.
The broader lesson is that seasoning is ongoing. A cast iron skillet becomes easier to manage with routine use, attention to dryness, and occasional refreshes. That is one reason many home cooks view cast iron as a long-term staple rather than a one-and-done pan.
Quick recap
If you want a concise answer to how to season a cast iron skillet, the process is straightforward: clean the pan, dry it fully, wipe on a very thin layer of oil, and heat it so the oil bonds to the metal. Repeat with additional thin coats if needed. Avoid thick applications, which can leave the surface sticky instead of seasoned.
The most useful habits are simple ones: start with a clean skillet, keep the coating thin, use steady heat, and store the pan dry. Over time, regular cooking and careful maintenance will keep building the surface. That is why seasoning is better understood as an ongoing part of cast iron care, not a single task you do once and forget.
For shoppers comparing cast iron skillets on Amazon, it helps to look for a pan that fits your stove, oven, and everyday cooking habits, then plan to maintain it from day one. A well-cared-for skillet can serve as a versatile everyday tool in a home kitchen.